|
Про железо |
|
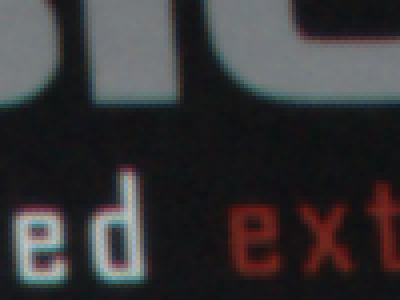
Casio Exilim EX-P600 RAW file conversion I'd like to start with a warning. This script is probably for image purists/advanced Photoshop users only. Others, I am afraid, will not appreciate it in the slightest. Firstly, it requires additional installs. Secondly, it's incredibly resource-hungry. (On my 3+ gigahertz Pentium 4 with 1 gigabyte of RAM it runs for about 3 minutes per image. With lots of hard drive swapping, too). And last but not least, to most people the output will appear as blurred with washed-out colors. So why did I make it then? Unfortunately, I have found that both "unofficial" modified dcraw and Debayerize 1 PS plugin leave color-comb and some other artifacts that cannot be simply removed without sacrificing image quality, and therefore make further image processing a lot harder. Sharpening, in particular, is almost impossible. Also, I wanted to see what happens if camera's internal image processing is replaced by no-compromise Photoshop routines, where you don't really care about how much processing power you throw in, and are able to control every step. I can't say I am fully satisfied with my script (it's not optimized yet, and requires further tweaking), but it already produces really smooth, almost pro-like images with good dynamic range and plenty of room for advanced sharpening and color correction. To see my point (or, more precisely, the lack of oddly colored ones :)) let's take a look at 4x magnified portion of the same RAW image processed by different software:
Modified dcraw - full
image
Debayerize 1 - full
image
My Photoshop script (Unsharp
Mask PS filter applied afterwards, 200%, 0.3 px, thrsh. 2) - full
image (Unfortunately, I cannot post full images in any other format than JPEG, due to very large file sizes. All of them were saved in Photoshop with JPEG quality setting at 100%, which is the maximum possible JPEG quality.) If you see the difference and feel intrigued, let me now describe the process. First, you will need a RAW file written by your Casio Exilim Pro EX-P600 camera to work with. I have my reasons not to post information on how to enable RAW mode here, so please refer to other sources for such information. (Thanks to Maurice Delaney) Second, you have to download the following software:
Please refer to Photoshop manual for information on how to install and run action scripts and plugins. My script should be compatible with Photoshop 7 and Photoshop CS, with latter more thoroughly tested. Please also note that I WILL NOT ACCEPT ANY DAMAGE CLAIMS WHATSOEVER. IF YOU DECIDE TO DOWNLOAD AND RUN MY SCRIPT, YOU ALONE ACCEPT ALL RISK INVOLVED AND RESPONSIBILITY FOR ANY DAMAGE IT MAY CAUSE. I am dead serious. As I previously mentioned, the script is so resource hungry that it is quite capable of overloading your PC up to levels where it ceases to respond and who knows what else. I can assure you, though, that I did not deliberately put any malicious code into it. Now, once you have everything installed, let's make a linear mapped
Photoshop PSD file. Create a new folder on your hard drive C: and
rename it to "MYRAW". Put dcraw.exe and your RAW file
into that folder. Run dcraw.exe on the RAW file with command-line
options
After that, you should have a new file called CIMGxxxx.psd. That file is what we actually need to continue. Now, start Photoshop. Make sure Bayerize plugin is properly installed (check Filter --> Bayer Pattern menu). This plugin will be used for Bayer pattern generation only, not De-bayerizing as you might think :) If you have Photoshop running already, close all open documents in it. If you didn't do that, script will not run properly. Also, unless you have a monster workstation with 2+ gigs of RAM, I'd suggest you close all other running applications in order to give Photoshop as much computing power as possible. Open the PSD file you just made in MYRAW folder. It should look almost completely dark and colorless when opened. Now, go to the Action menu, select ex_p600 Action set, then select "raw" script, then cross your fingers, then click "Play selection" button at the bottom of action palette window. Now you have enough time for a cigarette or cup of coffee. When/if script is successfully finished, you should have a 16 bit one-layer full color full size image you can tweak to your heart's content :) You will probably want to adjust levels, saturation and sharpness. All these should now work properly without colored comb patterns popping up everywhere. Also, due to smoothness, image will take less space when saved as JPEG... Well, you are on your own now, good luck, thanks for reading this :) I would like to express my gratitude to Владимир Родионов, who kindly provided me with invaluable information about compact digicams in general and EX-P600 in particular. You might want to read his review of Casio Exilim EX-P600 (in Russian.) UPDATE: I've added new action named raw_fast to the ex_p600 action set. It makes use of custom filters, works MUCH faster than the previous "raw" action (maybe ten times faster on my PC, so now there's no time left for a cigarette or cup of coffee) and produces different, yet sometimes even better images. I'd suggest you always use "raw_fast". I left the old one in the action set for testing purposes. UPDATE: New action raw_sharp is added. It's very fast and produces the sharpest images with no actual sharpening applied. Bayerize plugin is not required anymore. Prior to first time use, though, you have to create an actual bayer pattern. To do it, follow these steps:
You have to do it first time only. After that, you can play "raw_sharp" action just like the other actions. The settings you've made willl be saved when you exit Photoshop. Gene
|